Ready to build a safe and mobile home for your chickens? This guide provides a step-by-step plan for constructing an A-frame chicken tractor, perfect for beginners and experienced homesteaders alike. We'll cover materials, tools, construction, safety, and customization. This design prioritizes ease of construction and effectiveness, making it an ideal starting point for your backyard poultry project. For more detailed plans, check out this helpful guide.
Why Choose an A-Frame Design?
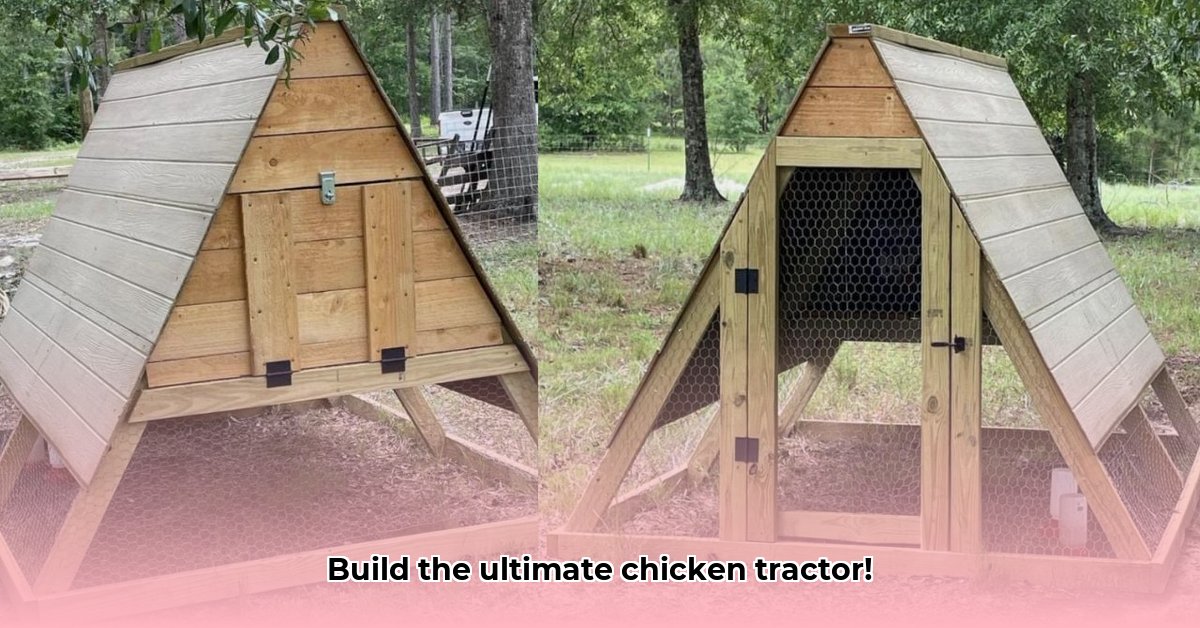
The A-frame design is favored for its simplicity and effectiveness. Its sloped roof efficiently sheds rain and snow, while the sturdy, yet lightweight structure makes it easily movable. Unlike more complex designs, the A-frame offers a great balance of ease of construction, cost-effectiveness, and practicality—a perfect choice for beginner builders. While other designs exist (like those utilizing more complex framing techniques), the A-frame shines in its ease of assembly and suitability for first-time chicken tractor builders.
Materials List: Sustainable Choices for Your Chicken Tractor
This list provides approximate quantities for a small tractor; adjust as needed for your flock size. Prioritizing recycled or repurposed materials is both cost-effective and environmentally friendly.
| Material | Quantity (Approximate) | Notes |
|---|---|---|
| 2x4 Lumber | 8-12 pieces, 8ft long | Pressure-treated lumber recommended for durability. Consider reclaimed wood. |
| Plywood or OSB | 1 sheet (4x8) | Recycled plywood is a great eco-friendly option. |
| Hardware Cloth | 1 roll (at least 25 sq ft) | Smaller mesh prevents small predators; chicken wire is less durable. |
| Heavy-Duty Hinges | 2 | Strong hinges are crucial for daily use. |
| Exterior-Grade Screws | As needed | Use sufficient screws for a robust structure. |
| Wood Sealer/Paint | 1 can | Protect the wood; choose a non-toxic option. |
| Wheels (optional) | 4 | Durable wheels make moving the coop easy. |
Tools Required: Your DIY Arsenal
Before you begin, gather these essential tools. Many are likely already in your possession or easily borrowed.
- Measuring Tape and Pencil
- Saw (circular saw or handsaw)
- Drill and Drill Bits
- Screwdriver(s)
- Hammer (optional)
- Wire Cutters/Pliers
- Level
- Safety Glasses and Work Gloves
Step-by-Step Construction Guide: Building Your A-Frame Tractor
This detailed guide breaks down the construction process into manageable steps. Remember, safety first – always wear safety glasses and gloves.
Step 1: Constructing the A-Frame:
1.1 Cut two 2x4s to your desired height (4-5 feet) for the A-frame sides. 1.2 Use metal connector plates (recommended) or slightly overlapping and screwing to attach the top ends, creating the peak. Ensure it's square using a level.
Step 2: Building the Base:
2.1 Cut additional 2x4s for the base (at least 4 feet long). 2.2 Attach the base pieces securely to the bottom of the A-frame, forming a rectangle. Use multiple screws per joint for strength.
Step 3: Adding Walls and Door:
3.1 Cut and attach plywood or OSB to the sides and back. 3.2 Cut a section for the access door. Consider your chickens' size. 3.3 Attach the door using hinges.
Step 4: Installing the Hardware Cloth:
4.1 Measure and cut hardware cloth to fit. 4.2 Attach securely, creating a predator-proof barrier; staples or wire ties are effective.
Step 5: Constructing and Attaching the Roof:
5.1 Cut a plywood or OSB piece for the sloped roof. 5.2 Attach to the A-frame, ensuring proper overlap for weather protection.
Step 6: Adding Wheels (Optional):
6.1 Attach sturdy wheels to the base corners for mobility.
Step 7: Finishing Touches:
7.1 Apply a water-resistant sealant or paint to protect the wood.
Safety Precautions: Protecting Yourself and Your Flock
- Always wear safety glasses and gloves.
- Use power tools cautiously; follow manufacturer instructions.
- Secure all joints and connections.
- Regularly inspect for loose screws or damage.
Customization and Variations: Personalizing Your Tractor
This is a basic design; feel free to customize! Consider adding nesting boxes, roosting bars, or a ramp. Adjust dimensions as needed. Building a chicken tractor is as much about functionality as it is about personal expression; feel free to add your own flair.
Conclusion: Your Chicken Tractor Awaits!
You've successfully created a safe and efficient home for your feathered friends! Share your project and any modifications you've made. For alternative designs, explore other resources. Remember, regular maintenance is key to ensuring the longevity of your chicken tractor. Happy chicken keeping!